Roller bandage is one of the most important items in a first aid kit as it has many uses from a pressure bandage for animal bites to reducing swelling and soft tissue injuries.
Roller bandage is a standard for most first aid kits. It has many practical uses. Roller bandages can be made from lightweight cotton, crepe or elasticised crepe. Although it is generally recommended to use any material that has some degree of stretch in the weave, making the bandage easier to use and more likely to stay in place for many hours. The material used will depend on the pressure aimed for. Moreover, safety pins or adhesive tape will also be needed to secure the bandage in place. It is advised to avoid the use of metal clips because they are less secure and can therefore easily gall out during an activity. It is called a roller bandage because it is rolled to an injured part of the body.
Purpose of Roller Bandage
As previously mentioned, a roller bandage has many different uses. The following are the most common uses of roller bandage.
- Keeping a dressing in place on a wound
- Aid to cease bleeding by maintaining pressure over a bulky pad
- Pressure bandage for animal bites
- Apply pressure to a limb
- Support an injured joint or limb
- As a cold bandage, it used to help limit swelling
Applying a Roller Bandage
The correct width of roller bandage for the body part is crucial in all cases. The following widths are recommended as a general guide.
- Lower arm, elbow, hand and foot – 75 mm
- Upper arm, knee, and lower leg – 100 mm
- Large leg or trunk – 150 mm
How to Make a Roller Bandage
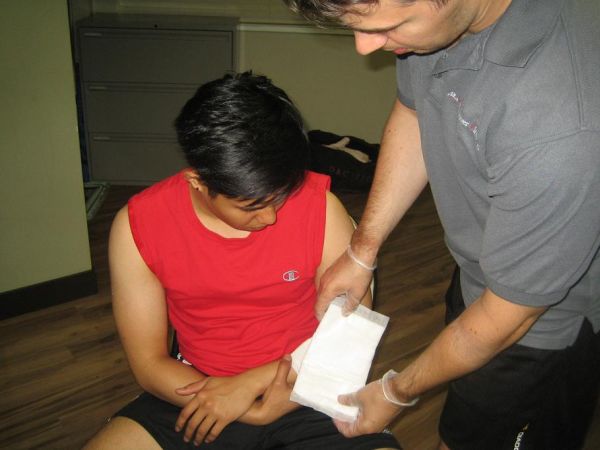
Correct application technique is critical in first aid. To properly apply a roller bandage:
- Bandage the part in the position where the patient is most comfortable. Ensure that the affected part has enough support before applying the bandage.
- Hold the “head” of the bandage on top while wrapping the “tail” around the affected part. Unroll only a few centimetres at a time to ensure that a right amount of tightness is applied.
- To hold the start of the bandage securely, begin with a locking turn after each following turn.
- Begin from the middle part of the body or limb towards an outward direction.
- Begin with the narrowest part below the dressing and work upwards.
- Make sure that each turn will cover two thirds of the preceding turn.
- Completely cover any dressing and padding used for the injury.
- To end the roller bandaging, finish with a straight turn at the end of the bandage.
- Secure the bandage using a safety pin or adhesive tape.
- If there are signs of poor blood circulation (e.g. bluish tips), loosen or remove the bandage.
Disclaimer: The information from this article does not provide medical advice and should not be substituted for formal training. Seek medical attention when necessary. To learn more about to how to make a roller bandage and other types of bandages, enrol in First Aid Courses and CPR Courses with St Mark James Training.
Online Sources:
http://www.stjohn.org.nz/en/First-Aid/First-Aid-Library/Immediate-First-Aid1/Dressings-and-Bandages/
http://www.peoplecare.com.au/Your-health/First-Aid-Fact-Sheets/First-Aid-Fact-Sheet-Results/ID/243?returnurl=http://www.peoplecare.com.au/Your-health/First-Aid-Fact-Sheets